Export Order and Process Subfolders in Capture One 14.3: There, Fixed It For Ya Part II

Like a lot of pro users, I’ve been running into the issues brought on by the new, lobotomized, thoroughly ruined Export dialog in Capture One 14.3. (For those new to this suckfest, go check here, here, and here, among other places. And for the love of Niels Knudsen, don’t upgrade to 14.3 for critical work if you have a remotely complex export workflow, particularly if you’re on a catalog, if you haven’t yet!).

But as it happens, having been on beta, I now have sessions that I’m going to need to export, and am running into two limitations: first, the fact that C1 doesn’t export images in the order you choose them when using Manual sort (so if you need to export things in a format like Img1, Img2, Img3, then you’re SOL unless your image order matches the filename order); and second, the fact that output subfolder support has been removed entirely with the new Export tool. And while I could always regenerate my sessions on 14.2 and copy the files over, I rather like some of the new functionality and speed of 14.3. What’s a busy shooter to do?

Get scripting, that’s what! Time to go work around a couple of Capture One’s bugs while we wait for them to hopefully bring the old Process tabs back…or at least fix some of the more egregious bugs that some of us reported in beta. Here goes: three scripts to make this process at least bearable. You’ll want to download these, save them off/set the permissions appropriately using Script Editor for your machine (yeah, I should really get myself an Apple Developer membership so I can properly code sign things…), put them in your C1 Scripts folder, and go.

Process In Correct Order: This script processes images in the correct order. To use, set your Export recipes using the Export dialog, reset image counters as you see fit, and hit Close rather than Export. Once you close the Export dialog, go to Scripts > Process In Correct Order, and your images will come out in the correct order.

Set Output Subfolders: This updates the selected recipes (it defaults to your currently selected recipes) to the subfolder you enter, relative to the Output folder. You do not need to create the folder—the script creates it for you if necessary, just as C1 used to! (What a concept, right?). It then updates your recipes to use that folder.

Restore Output Subfolder: This updates the selected recipes (like Set Output Subfolders, it defaults to your currently selected recipes) to use the default session output folder; effectively undoing the above script. Depending on your workflow, you may want to modify this to run automagically on process complete so you don’t forget where you’re exporting to.

Terms and conditions

These scripts are offered as AdvocacyWare. They come with no warranty, express or implied. I am not responsible if they cause damage to your machine, your files, etc. I would rather be using real functionality than having to hack around C1’s rotten development practices and failure to listen to their loyal customers who depend on their software and faithfully beta test for them, but here we are. So…

If you find them useful, by using these scripts you promise to do one or more of the following actions for the Capture One user community:

  1. Donate a beer’s worth for my efforts here

  2. If you’re a Phase One hardware owner or a POCP, open up a support case urging Capture One to bring the old Process workflow back in a future release…and/or fix their missing functionality. Also, let your dealer know—they probably won’t be able to do much right now, but they can report back how frustrated everyone is.

  3. Add your name to this change.org petition.

  4. Tell Capture One that if they don’t fix it, you’re dropping your subscription and/or refusing to upgrade because they’ve broken things we pros (and lots of others, it seems) depend on for our work, and money talks. Since C1 is owned by private equity, it’s probably one of the only things they’ll actually listen to.

  5. …And actually do it, if this doesn’t affect your workflow. (You can always use the trial version if you have multiple licenses…)

  6. Tweet at the official Capture One account, @captureonepro and Capture One CEO’s personal account, @rafaelcoyote, urging them to fix this ASAP. Add your voice to other discussions on social media if you feel so inclined.

Download

Download ExportScripts.zip

Mask Drawing Shortcuts for Capture One 21 14.3: There, Fixed It For Ya!

If you’re using Capture One, you probably know that the newest version (14.3.0) dropped today. If you’re reading this, you’re probably installing it and putting it through its paces. The new Magic Brush works super well for dealing with sky and flat-coloured textures, which is of great help to those of us doing architectural photography (who would have otherwise used the Color Editor, created a color area mask, and then edited it from there. OK, so there are situations when I’ll still end up doing that), but…

When it comes to mask visibility, Capture One giveth and Capture One taketh away: one of the things you’ll find yourself wanting to do is switch between ‘always show mask’ and ‘only show mask when drawing’, particularly as you learn how the Magic Brush works in your workflow. They’ve moved these options (only) up to the menu bar, which is somewhat inconvenient, but worse yet: they removed the shortcut keys for these and there’s no option to get them back! .

Having submitted this notable omission as a bug on every beta release they put out and it still isn’t fixed in the release version, it’s time to take matters into your own hands. Here’s what to do if the lack of shortcut keys for these functions bugs you as much as it bugs me:

  1. Open Capture One 21

  2. Go to System Preferences, Keyboard.

  3. Open the Shortcuts tab

  4. Open App Shortcuts

  5. Click the + button, and add Capture One 21

  6. Create a shortcut key for Always Display Mask and Only Display Mask When Drawing. Unfortunately, you can’t have them toggle (which is what I’ve always wanted), but you can put them on adjacent keys. I’m using Option+M for Always Display Mask (which is close to the old M shortcut for this in previous releases), and Option+N for Only Display Mask When Drawing. Since I edit with a touchpad to the left and a Wacom tablet to the right, this puts the two shortcuts in a convenient place when I’m editing.

  7. To make sure it works, go back to Capture One and check the Layer menu. You should now see the shortcut keys you assigned show up in the menu for the appropriate options, as Capture One should have given you the functionality to do in Edit Shortcuts… but, for reasons known only in Denmark, they didn't.

Happy editing!

Oh, and speaking of stuff they left out: if you’re a pro user, you’re probably also missing a bunch of the functionality and smoothness that the old Process tab workflow had. I know I certainly am—a bunch of stuff including setting metadata, subfolders, etc. that used to be a couple of clicks away in the old workflow is now much slower and clumsier, not to mention being able to work on another project easily while seeing where C1 is on its batch export. If you miss the old Process workflow, and you own Phase gear/are a POCP/otherwise get premium support [read: they actually might listen to you], go submit a support case and ask for it back in a future release. I did in beta and will be going over there to yell at them further for this. To paraphrase the old political saw: today we protest, tomorrow we script.

A COVID-19 Update

Like many of you, we’re rejoicing in the reopening of some parts of “normal” life, and reduced case counts in BC. With Stage 3 reopening in BC, and a partial reopening of the US Border, we’re pleased to announce a few changes in the projects we can service, and how we can service them.

Who’s That Masked Man Behind the Camera?

While some gleefully ripped their masks off and tossed their sanitizer bottles in recycling at 12:01 on July 1, we’re…well…not doing that just yet. With the international rise of COVID-19 variants of concern, I’m taking it a little slower to protect our clients and our clients’ clients: while I’m fully vaccinated, I’ll remain masked up (double masked by request, if you’re really concerned) while photographing indoor spaces. Whether you mask up when I’m in your space is your choice. If you have specific COVID-19-related concerns, or your clients do, we’re happy to accommodate them.

Land, Sea, and Air

With reduced travel restrictions, I’m able to service projects across Canada as usual, subject to provincial quarantine/testing regulations. If your province requires COVID testing on entry/exit, you will be billed for the cost of this + any additional days I have to wait for results before going/leaving onsite.

Hey America, We’re Back!

Since I’m a dual citizen, we’re once again able to service US-based projects based on current border restrictions. Given that a within-72-hours COVID test is still required at the Canadian border, we’re intending to batch US projects so that we can plan to spend more than 3 days at a time in the US. If you’re in the US, or you’re in Canada and you’re waiting for us to photograph your US projects, please let us know (well in advance, if possible), so we can get things scheduled.

2021 HAVAN Awards Resources

2021 HAVAN Awards Resources

HAVAN recently opened the Call for Entries for the 2021 HAVAN Awards. The what, you ask? Yes, in keeping with the rebranding of the GVH…oh, whatever it was, what used to be known as the Ovation Awards got rebranded this year into the HAVAN Awards. Same great awards program, nifty new name (and really, really nifty new trophy!)

We love the HAVAN Awards because there are all sorts of wonderful little “boutique” categories to fit specialty projects in, and given the innovative work that a lot of our clients are doing, our clients’ projects always do very well in the HAVAN Awards. But with all those categories (57, to be exact!), there are a lot of things to be aware of, as well as a lot of opportunities to win. But just getting started can be a daunting proposition. Our awards packages make this a lot easier for you because you can get us to share our wisdom, photograph your entry, write your writing, and hold your hand through the upload process.

But we know that a lot of you—particularly in the developer and supplier communities—have your own marketing teams, or you like to take a DIY approach. As you probably tell your clients, it’s always a good idea to know what you’re getting into first before you get out the tools and get down to work. To help you with that, we’ve put together three roughly-half-hour videos for you. In the past, we’ve done these as live webinars, but since it’s 2020 and your schedule is either far too packed or far too open, we’ve recorded them so you can view them whenever you want…at your desk, in your truck waiting at the next jobsite, or even while waiting in line at the local Costco. :-)

HAVAN Awards for Builders/Developers

HAVAN Awards for Renovators

HAVAN Awards for Suppliers

We hope you enjoy these, and we’re looking forward to seeing what excellent projects you’ve been working on this year!

HAVAN Awards for Housing Excellence

Capture One Hack: Don't like waiting after copying a session?

Update: Capture One 13.1.2 fixes this. You’re welcome!

Have you run into this annoying Capture One bug?

Say you’ve worked on a session on your capture machine, and now it’s time to copy the session over to your editing machine (or your backup drive). You copy the session over. When you open the session, Capture One proceeds to go through and uselessly repaint all the thumbnails and regenerate the previews, often twice if you’ve done edits on the session before copying it. For those of us who shoot 150MP files—or if you’re working on a slow drive—this can take forever, even on a fast machine.. Meanwhile, you’re off checking your email, fixing another cup of coffee, and checking Facebook while you wait for Capture One to give you your session back, when you would really rather be editing…

We run into this all the time, and it turns out that the cause has to do with how file dates get stored/compared in your C1 session files and subtly mangled by your machine’s filesystem(s). Modern filesystems (e.g. APFS, NTFS, ext4 on Linux) store modification dates as “number of seconds since 1 January 1970”, in fraction-of-a-second resolution. Older filesystems (FAT32, HFS+) are limited to storing modification dates rounded to the nearest second. Network file sharing protocols (SMB, AFP; possibly some NFS flavours but I haven’t tested it) are known to have issues truncating or rounding the fractional part of the date. So, a .cos file Capture One creates on your capture machine with an APFS filesystem might have the date stored as 1594937221.1234; copy it to your editing machine over the network and it might come up as 1594937221.1; save it on your HFS+ backup drive and it might come up as 1594937221.0. That loss of precision and lack of tolerance (as those of us with Computing Science degrees, like yours truly, would say) causes Capture One to go “whoa, the settings file changed outside of what the session says it should be!”, and proceed to resync everything. Slowly.

If you copy from one drive to another on the same machine that’s formatted identically (e.g. from one APFS drive to another), you’re home free, or if you’re copying from an older-formatted drive to a newer-formatted drive (say, an HFS+ RAID drive to your internal APFS-formatted SSD). If you’re starting off on an APFS drive and have to copy off it to an older-formatted drive, or over the network, the dates change subtly and C1 resyncs.

We’ve reported this in to Phase One, so we hope that they’ll fix this in a future Capture One 20 point release. In the meantime, we’ve written an Automator action to truncate the file modification times on all your .cos files to the nearest second so that everything lines up correctly if your network or file system has mucked things up, and update your .cosessiondb accordingly. This tool has been tested on the current version of CO20.1 on macOS Mojave (Your mileage may vary if you’re running macOS Crapalina). Use this tool at your own risk. We are not responsible for any damage it might do (though it does make a backup of your session file, just in case). if using this tool blows up your machine, destroys your session, or brings down the wrath of the Image Quality Professor upon you, it’s your own damn fault. That said, here’s how it works:

  • Unzip the .zip, and copy the Automator action onto a convenient place (like your desktop).
  • Copy your session file into its new location

  • Drag the session folder onto the ‘Fix Session Dates’ action. (This script assumes you have a single .cosessiondb file in the root of your session).

  • You’ll get a notification when it’s done.

  • Open up your session, and get editing!

Grab a copy here.

That Old Thing‽ - Part 3: Photographing Past Projects

That Old Thing‽ - Part 3: Photographing Past Projects

We’ve come to the last, and certainly not least, part of this series on working with past projects. (If you’ve missed the previous articles, check them out on our blog). By now, you know why you shouldn’t ignore your past projects in your marketing, and you’ve earmarked what past projects you want to work with and are dripping them across your social media channels (and/or you’re asking us about them; yes, we’ve heard from a few of you!). You have probably also identified a few past projects that you don’t have photos of and are now considering having photographed. Let’s make that happen!

Traditionally, architectural photography usually happens right before/after the client moves in, and before they have a chance to screw up your design have it evolve according to their needs. When you’re considering having past projects photographed, you’re coming back well into the life of the building, and that can bring both challenges and opportunities for everyone.


The Benefits of Photographing Past Projects

The biggest tangible benefit of photographing past projects is, of course, getting to add the photos to your portfolio and using the photos to keep your marketing running along. Depending on your timing, you might even be able to squeeze an award entry or two in if the project is recent enough: a lot of awards programs have 1.5 or 2 year cycles, so check your completion dates carefully. As I mentioned in the first part of this series, past projects can still look good later, and it makes for an even better story if your project that started out amazing has stood the test of time and is still amazing, years down the road.


But in addition to marketing, there are all sort of things you can learn from visiting past projects. We won’t get into the ins and outs of post-occupancy evaluation, but suffice it to say: revisiting projects can let you see things that worked well, perhaps need to be changed, and things you can learn from in the future. You’re getting a glimpse into the life of your project beyond its substantial completion. Landscaping that needs time to grow in has gotten that time and probably looks better; people have hopefully hung good artwork on the walls; and on commercial projects, your project is supporting whatever current use your client is making of it. You are also seeing what didn’t quite work as expected and might either need work to make better, or could be the seed for future clever solutions on another project. Getting that glimpse is good for you as a professional, and it’s also a good benefit for your past, present, and future clients when some learning and the occasional fix comes of it...in addition to a set of great photos.

A lovely heritage renovation, photographed empty after completion to show the then-new LED uplights

A lovely heritage renovation, photographed empty after completion to show the then-new LED uplights


The same project, 4 years later

The same project, 4 years later

Getting In

The first step is to figure out whether you can have a space photographed, and that starts with getting access to it. You should plan to make a trip by your project to scope it out and see if it’s still worth photographing, and secure access to it if it is. 
If you had a good relationship with your client, this might not be a problem at all-—you just get to come on by some fine day with a bottle of wine or a good gift basket, casually drop in the “hey, mind if my photographer comes by for a day and photographs the place?” question in conversation, and your fantastic client who keeps everything exactly as you designed it (or did something that makes your design shine even more!) lets you schedule the shoot and everyone walks away happy. But sometimes things have changed so drastically that it isn’t worth coming back in to photograph, or a space has unexpectedly changed hands; you also need to have a good idea as to what you’re going to have to do so your can prepare things for photo day as if it were a new project 
If it’s a project you care about, and your client is being difficult, there are a number of things you can try in order to get back in. Often, offering your client something (or a lot of things) of benefit to make their lives easier will work great: for residential clients, this might be as simple as paying for a cleaner to come through and spiff everything up while they get to take their family and relax at a favourite spot for the day: they get a quick break, and come back to a clean space with some fresh flowers to enjoy. For commercial and hospitality clients, giving their marketing folks an opportunity to share in the process and get access to the images they need can give everyone a win and save effort and money (particularly if you arrange this in advance; talk to us as we can make this easier for everyone).

You could also offer to work with your client a bit to figure out if there are any minor deficiencies that have cropped up, and get them fixed; or if there’s something about the project that could be working better that you could easily take care of for them. Fixing a hard-to-reach light fixture, taking care of an annoying paint scuff, or refinishing their reception area table that’s now all covered in coffee stains could get you back in. While this may end up costing you some extra time and money, if it’s a major project that you really need for your portfolio, it could be definitely worth it...particularly if you can get a good client testimonial and possibly more work out of it. We’ve also seen the odd project where some minor frustration with a completed space turns out to be the catalyst for another piece of renovation work, leading to a good “before and after” study and another project for your firm. Changes due to dealing with COVID-19 could be a big driver of this, particularly in retail and office interiors.


To show age, or not to show age?

Depending on how long it’s been since your project completed, some parts of your project might have improved with time (landscaping, Cor-Ten steel, etc.). On the other hand, there might be places where your client did something that wasn’t part of your design, something broke, or there might be inappropriate signage. Some of this might be fixable (either on site or in post), and sometimes it’s better to just not show things you don’t want to show.

This lush landscaping didn’t grow overnight…

This lush landscaping didn’t grow overnight…

This is something you’ll need to decide on a site visit. If there are angles where everything shows the way you want it to without showing parts you don’t, let us know; better yet, take a quick photo with your phone so we can line everything up appropriately. If there are things that are “close, but need a bit of work” (signage, nail pops, the occasional water stain , point those out to us either before or during onsite photography, as there are often clever tricks and work in postproduction that we can use to make things look a lot closer to your original design intent than you might expect.

Sometimes, you can get the effect you want by simply removing and replacing accessories and furnishings. In single-room projects (particularly in kitchens and baths), this is particularly effective because the materials are intended to be hard-wearing and can be easily cleaned...and whatever tough dirt there is that can’t be removed on site can be removed in post. A cleverly placed accessory can also cover up the odd spot where things haven’t aged well. Sometimes you end up with the opposite problem: you can’t move an accessory and it has to be removed in post.


Showing/telling a better, wider story

As I’ve mentioned before, working with past projects gives you the opportunity to be part of the wider story of your building’s evolution, and communicate about that story with your current and future clients. If you have past projects that are “wearing well,” that’s a testament to the goodness of your design work and something you can be proud to show off and talk about. You don’t just have a project that looked great when you completed it, you have a project that still looks great. If you have past projects that might need to be changed soon and need to be documented before they change too much, those photos might be the best if not only record of the work you did. We love photographing projects at any step along the way, so let’s...bring your past projects back to life!

That Old Thing‽ - Part 2: Reusing images from past projects

That Old Thing‽ - Part 2: Reusing images from past projects

After reading the last post, you might have started thinking about past projects you’ve had photographed. Maybe you went back into your files, and you had a nice trip down memory lane...and maybe you even rediscovered some past projects that could be useful for your media efforts. (It happens to us as well!). When you’re considering using photos from past projects in your media work, there are a number of things you should be asking yourself:

What photos do you have?

In an ideal world, you’d look back and find that you had all the images you thought you had, in the formats you want, and easily accessible. If you were able to do this, bravo! If not...you might want to think about how you (and others in your firm) can get to those images easily. We recommend putting all your image files that might be used for publication work in one common folder tree on whatever you’re using for shared storage, because it’s way faster and easier for someone to use image browsing software to just look down the tree and see what’s there. There are plenty of tools out there to make image browsing easy; we’re fans of Phase One’s Capture One. If you’re an Adobe Creative Suite (or Photoshop) subscriber, you can do this with Bridge or Lightroom; the tools included with Windows and macOS also do a decent (albeit often slow) job.

Resolution: yesterday’s “print” is today’s “web”

Besides making sure you have the photos, you’ll want to make sure you have the photos in a resolution you can use. Over the last few years—thanks to the proliferation of retina screens, high-resolution cellphone displays, and 4K+ monitors—what counts for “web resolution” has changed a lot. A decade ago, we were shipping “web res” images at about 1024x768, and “print” images at about 3000x2400.  If you have print-resolution images from years past, you’ll have enough resolution for today’s website and social media use. If you have web-resolution images from years past, look at the image information closely, as you might need to relicense full-resolution images for things to look their best.

If you have full-resolution images, you have a lot of flexibility because you can crop and resize those images down to whatever size you need. We’ll be putting together a quick video on cropping soon if you’re not familiar with the process.

What photos don’t you have?

It’s common practice for photographers to produce many more photos than you actually use. On a residential project, we might produce 50-60 images, but most awards entries and a lot of other media work take 8-15 images per project. Your needs now are probably not the same as they were when you first licensed images from the shoot. If you’re looking at a set of images and going “surely, we photographed more than this!?”...chances are, you’re right! Give us a shout and see if we have more images available that you can license.

Can your old photos look better?

Technology marches on, and that includes the tools we use for processing images. Since we photograph everything as “raw” images, it often happens that if you ask your photographer for a fresh set of images and you have specific things in mind (i.e. “brighten everything up”, “tweak the colour balance”, etc). you’ll get better results from old images simply because we can apply new tools to them. Styles evolve and fashions change, particularly when it comes to how we photograph and process interior scenes. For example, we photographed this interior five years ago. What we shipped originally was this:

Seiba High Point Original

A quick few clicks of the mouse—to upgrade the “processing engine” to take advantage of five years worth of upgrades—gets us to this:

Seiba High Point Upgraded

You’ll notice that among other things, the side balconies have brightened up and have more consistent colour, and the shadows look a bit more “airy”. The colours around the dining area and kitchen are also looking better.

Giving a nod to the current trend of neutral-heavy interior colour palettes—combined with better postproduction tools, we get to this:

Seiba High Point Re-Edit

This can make it possible to have a much more “fresh” looking view of an old project without you—or us—having to do much work at all. 

What happens after it’s photographed?

Photo day is but one day in the life of your project. While the lifecycle of commercial projects can be far shorter than we’d all like, the lifecycle of residential and institutional projects is often much longer. It’s possible that you’ve ended up with an old project that has changed and grown—for better or for worse—over the course of the years. It’s a rare pleasure to return to do old projects: we’re awaiting photographing a kitchen in a house that we’ve photographed three renovations in. Seeing what’s changed and what’s stayed the same can be an interesting part of the story—and can also lead to more work and happier clients for you. 

Next, I’ll talk about some tips and tricks in having old projects (re)photographed.

That Old Thing‽ - Part 1: Marketing With Your Past Projects

That Old Thing‽ - Part 1: Marketing With Your Past Projects

When a project finishes—especially when it’s late and over-budget—it’s sorely tempting to wrap up the final deficiency review, share beverages with your team, and get on to the clean slate of whatever your Hot Next Project is. Fast forward a few months (or a few years)...

Suddenly, you get a phone call from the editor of your favourite design magazine, wondering if you have something that’s going to fit an upcoming issue. Or, perhaps you finally find the time to go through your past projects and update your website, or start a new social media campaign. You start racking your brain, trying to remember back to your projects from years back, and seeing if something might happen to fit the bill for whatever your editor—or your newly-hired social media coordinator—wants you to provide.

Recently, we’ve had a number of “old projects” get published: a project we photographed in 2014 will soon be part of a Rizzoli coffee table on wine country architecture.

Wine Country Architecture


That’s been in the works for about two years now. Earlier last year, a house we photographed for a local builder a few years back became a five-page spread in a special issue of Westcoast Homes and Design that came out for the Fall Home Show last October. It still looked quite fresh and new even several years later. And lest you think that only big, showy projects age well: this meticulously designed tiny bathroom designed by Toula Favreau at Acanthus Interiors showed up in the 2020 Kitchens and Bathrooms issue of
Canadian Home Trends
, a few years after we photographed it.

Kitchens2020+DIGITAL_FULLMAG-42.jpg


Changes in design trends can also be a good opportunity to plumb the depths of one’s archive: we’ve recently had editors asking us for (particularly) kitchens that are “anything but all white”, and we’re happy to oblige...with projects we photographed a few years ago before Everything Went Neutral. Yes, everything old is new again.

But what if you have the perfect project...but you didn’t get it professionally photographed? You’re probably not out of luck! If your clients have kept to your design vision (or you can work with or work around what they’ve done), perhaps it’s time for a visit? This can not only give you excellent photos for future work, but also give you some fine opportunities to go back and learn from past work. As Stewart Brand and others are fond of saying: buildings learn over time, and seeing how your clients actually use your projects can give you some great ideas that will influence your future design work.

Starting tomorrow, we’ll first talk about reusing photographs from projects you’ve had photographed, and then we’ll talk about some best practices in photographing past projects.

Architectural Photography + Social Distancing

Architectural Photography + Social Distancing

Like everyone, we’re doing our part to flatten the curve of the COVID-19 pandemic. Since the entire team here is fully accustomed to working at home/on the road, we’re well-set-up for remote work and we’d love to talk to you about your projects. We’re also carefully following current guidance for keeping us—and you—as safe as possible. We’re all in this together, so let’s stay well and make the best we can of it, as much as we can!

The news changes seemingly every hour, so we’ll try to keep this post up to date as situations change. Our local associations have been doing a great job keeping everyone in touch. If you’re in residential/commercial construction around Vancouver, the folks at HAVAN and CHBA-BC have been doing a fine job of keeping everyone in the loop at https://havan.ca/covid-19-resources/ .

Working on your marketing?

This is a great time to let your clients know that you’re still around and will be after this pandemic, particularly if you’re a smaller firm. You might be, as we are, taking this as a much-needed opportunity to work on your business and your marketing/social media/awards work—after all, if your potential clients are sitting on their couches scrolling through Instagram, you might as well keep ‘em inspired! This might mean it’s going to be time for more photos of past projects. If we’ve photographed your project—even if we did it ages ago—let us know as we can very quickly process image relicensing requests since we’re spending a lot less time on location. We’ll also be posting several articles on revisiting and reusing past projects over the next while.

Photographing new projects (BC)

We’re following BC CDC’s guidance and current industry best practices for continuing work. At the moment, construction is considered an essential service: if stuff’s being built, we’re able to photograph it, as long as we can maintain social distancing. This means that projects that Martin can photograph solo are good to go: we aren’t bringing the team out for shoots. In particular:

  • Exteriors/landscape projects, both residential and commercial, are on. We’re finally starting to see the odd sunny day, and as spring plantings come into bloom, it’s a good time to start photographing early landscape projects—or planning to have them photographed later. For projects that benefit from having empty streets and less traffic, this is about the best time ever to photograph, as long as facades are clean and not boarded up for security purposes. Note that we may have difficulties accessing preferred vantage points from neighbouring buildings.

  • Commercial interiors without people are on. We’re developing ways to keep you connected to the shoot remotely. We recommend that you do any staging/furniture placement before I arrive, and can arrange contact-free key/access drops as necessary. When rules are relaxed, we’ll have a new prompt to get people to spread out appropriately in a large space: “go arrange yourselves to maintain appropriate social distancing!” You’ll get great results…but it’s not yet time for that, so let’s plan to work on those projects later.

  • Residential interiors may need to be delayed. Our current practice is: if it’s a residence that’s not regularly inhabited (e.g. show suites, display units, spec builds/homes for sale), I can photograph it. If it’s a residence that would be regularly inhabited (likely, it’s a renovation project) or if it’s a project where you want to take a “lifestyle” approach to photography, we’d prefer to reschedule it until current rules are relaxed (we’re figuring once gatherings of less than 5 people are permitted again).

  • Photographing out-of-town projects is currently subject to availability of food and lodging on the road. We expect that current restrictions may make projects outside Metro Vancouver not prudent to photograph at this time, but we’re happy to plan with you so that we can photograph them later in the year.

We will also be waiving reschedule fees until further notice—so if the rules change, or your schedule changes, or if Martin feels sick at all, we’ll be as flexible as possible.

Photographing new projects (Washington)

Given the current closure of the US/Canadian border to non-essential trips, we’re unfortunately unable to photograph new projects in the US until the border reopens.

Staying educated and connected

We miss you all! We’ve moved our usual lunch-and-learns online. Stay tuned for more information as we get events scheduled.

Looking at entering the Ovation Awards?

Looking at entering the Ovation Awards?

We’re big fans of HAVAN’s Ovation Awards—it’s one of the best local builders’ awards programs. The deadline is January 20, 2020. That means that it’s time for you to start work on your entry, before the holiday rush and the post-New-Years lull.

But with 57 categories, where do you even start? Well…you can start here, with our half-hour-long webinars tailored to developers, renovators, and suppliers. They’re free, so go check them out!

Ovation Awards for Developers

Ovation Awards for Renovators & Custom Builders

Ovation Awards for Suppliers/Architects/Designers

We’re also offering both photography and complete awards entry packages for your project, so if you’d like our help with your entry, we’d love to help you out.

Conquering Cancer, One Ride At A Time

Conquering Cancer, One Ride At A Time

While the several hundred pounds of gear and lighting we use on location is tough to carry on a bicycle, Martin and Susan have been known to use client meetings, errands, and site visits as a good opportunity to get km’s in on the bike: it’s fun, it’s often faster than traffic, and it’s more environmentally friendly as well.

This year, your favourite team for helping you get your work out and entered into awards programs is also cycling to…help conquer cancer! Both Martin and Susan will be riding in BC Cancer Foundation’s Ride to Conquer Cancer this August, and we’d love your donations. Help out a very good cause here:

Support Martin’s ride

Support Susan’s ride

"Design for Living" at West Van Museum

"Design for Living" at West Van Museum

We’re big fans of midcentury modern architecture, and it’s always a pleasure to be part of books, exhibitions, and other projects that help some of the last century’s most interesting residential architecture get better appreciated, preserved, and studied.

Locally, the West Van Museum has been doing phenomenal work in preserving this important architectural legacy. Besides running an excellent house tour annually (get your tickets now, it’s coming soon!), they’re also home to the archives of several notable architectural photographers (including Selwyn Pullan and John Fulker), and frequently produce absolutely excellent exhibitions. Protip: when you’re visiting the museum and walking up the narrow back stairs, look at the walls—they have a number of really lovely classic architectural images on permanent display for you to get nose-to-nose with.

Several of Martin’s images of the Sutton Place Residence are currently on display as part of their current exhibition, Design for Living: West Coast Modern Homes Revisited, on display until mid-July. They’re also part of the extensive exhibition catalogue, which weighs in at a solid 150 pages of photos, case studies, and scholarship. It’s well worth picking yourself up a copy at the museum.

And The Georgie Award Winners Are...

And The Georgie Award Winners Are...

It’s one of our favourite nights of the year: the Georgie Awards. Our clients did well this year: a large percentage of our entrants made it to the finals, and a couple of them took home some nice golden hardware! So, who won?

Project Mint - Urban Eco Barn

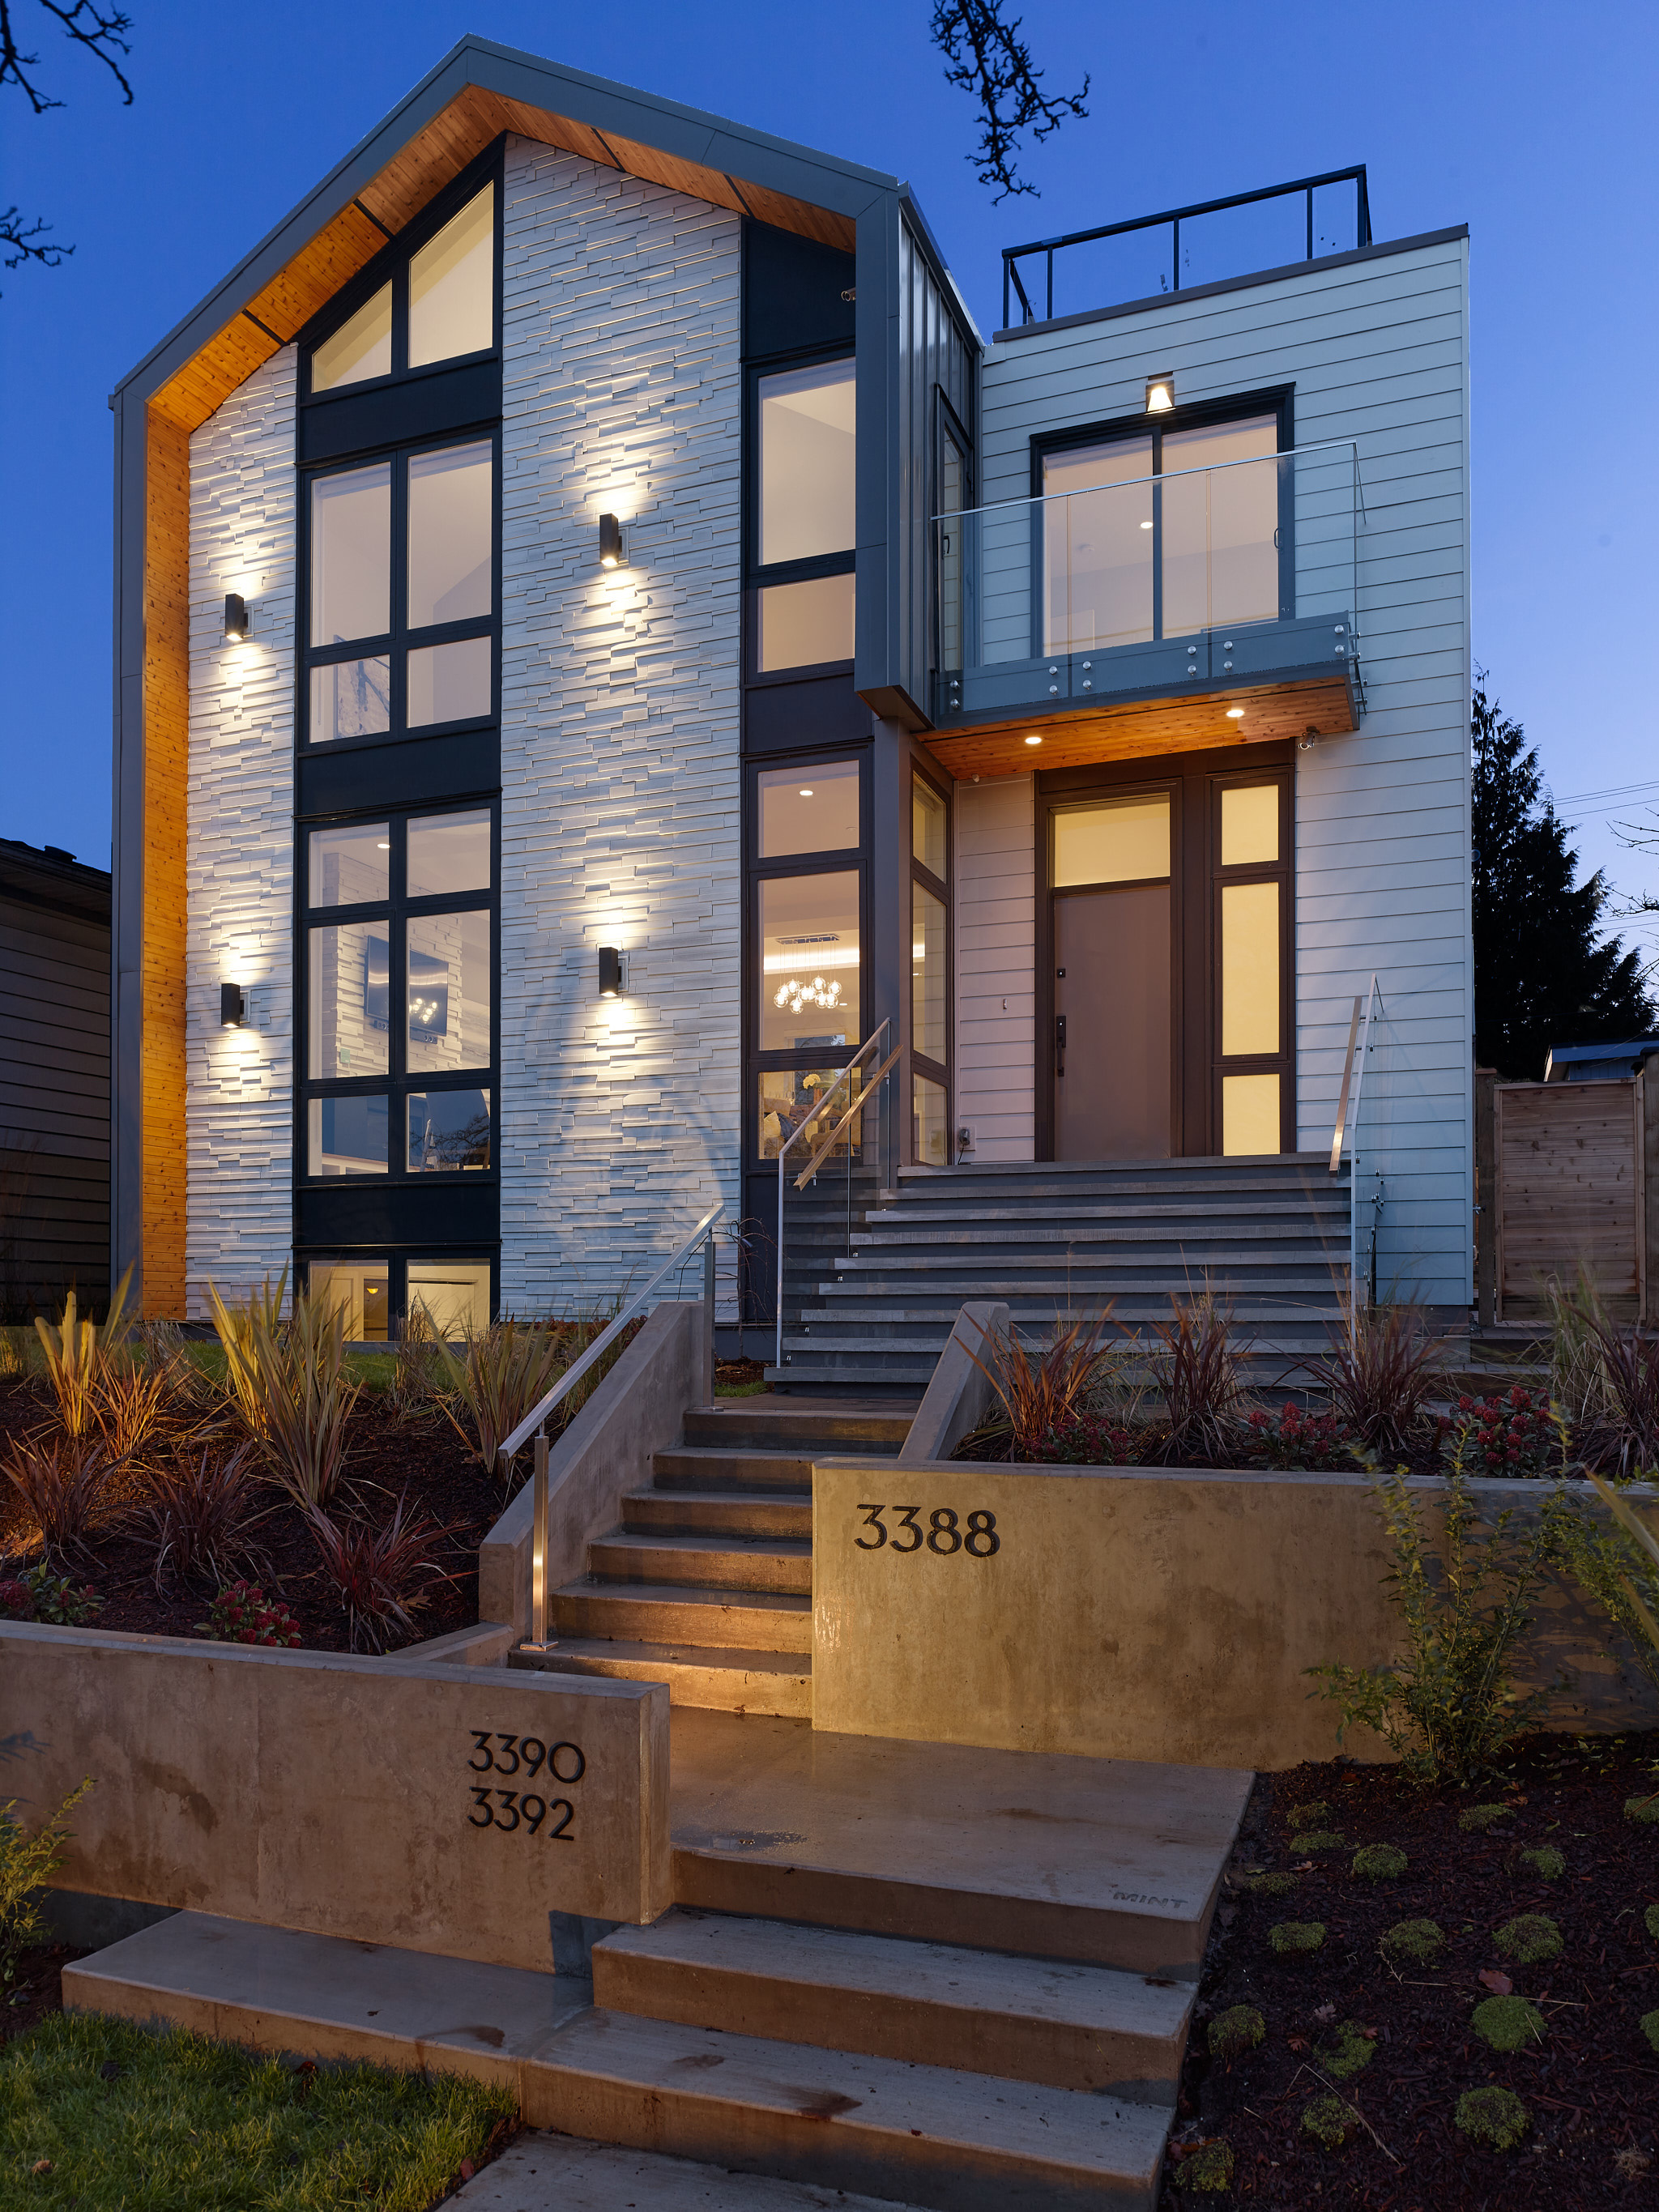
This project not only oozed architectural cool, it pulled off the clever feat of packing in at least separable units (three in the main house as an n-plex, plus a clever laneway that I wish I could move into…) onto one property while fitting into the scale of its mostly-smaller-residential Renfrew Heights neighbourhood. This project was a finalist in the Ovation Awards last year (for Best Small-Scale Home, Best Townhouse/Rowhome, and the BC Housing Award for Excellence in Innovative Housing). This “gentle density” approach gave it Best Multi-Family Townhouse (Infill; 6 Units and Under), and placed it as a finalist for Multi-Family Kitchen New and Custom Home 500-899K. Congratulations to Babak, Nick, and the crew at Project Mint and Nick Bray Architecture!


My House Design/Build - Caribbean Dream

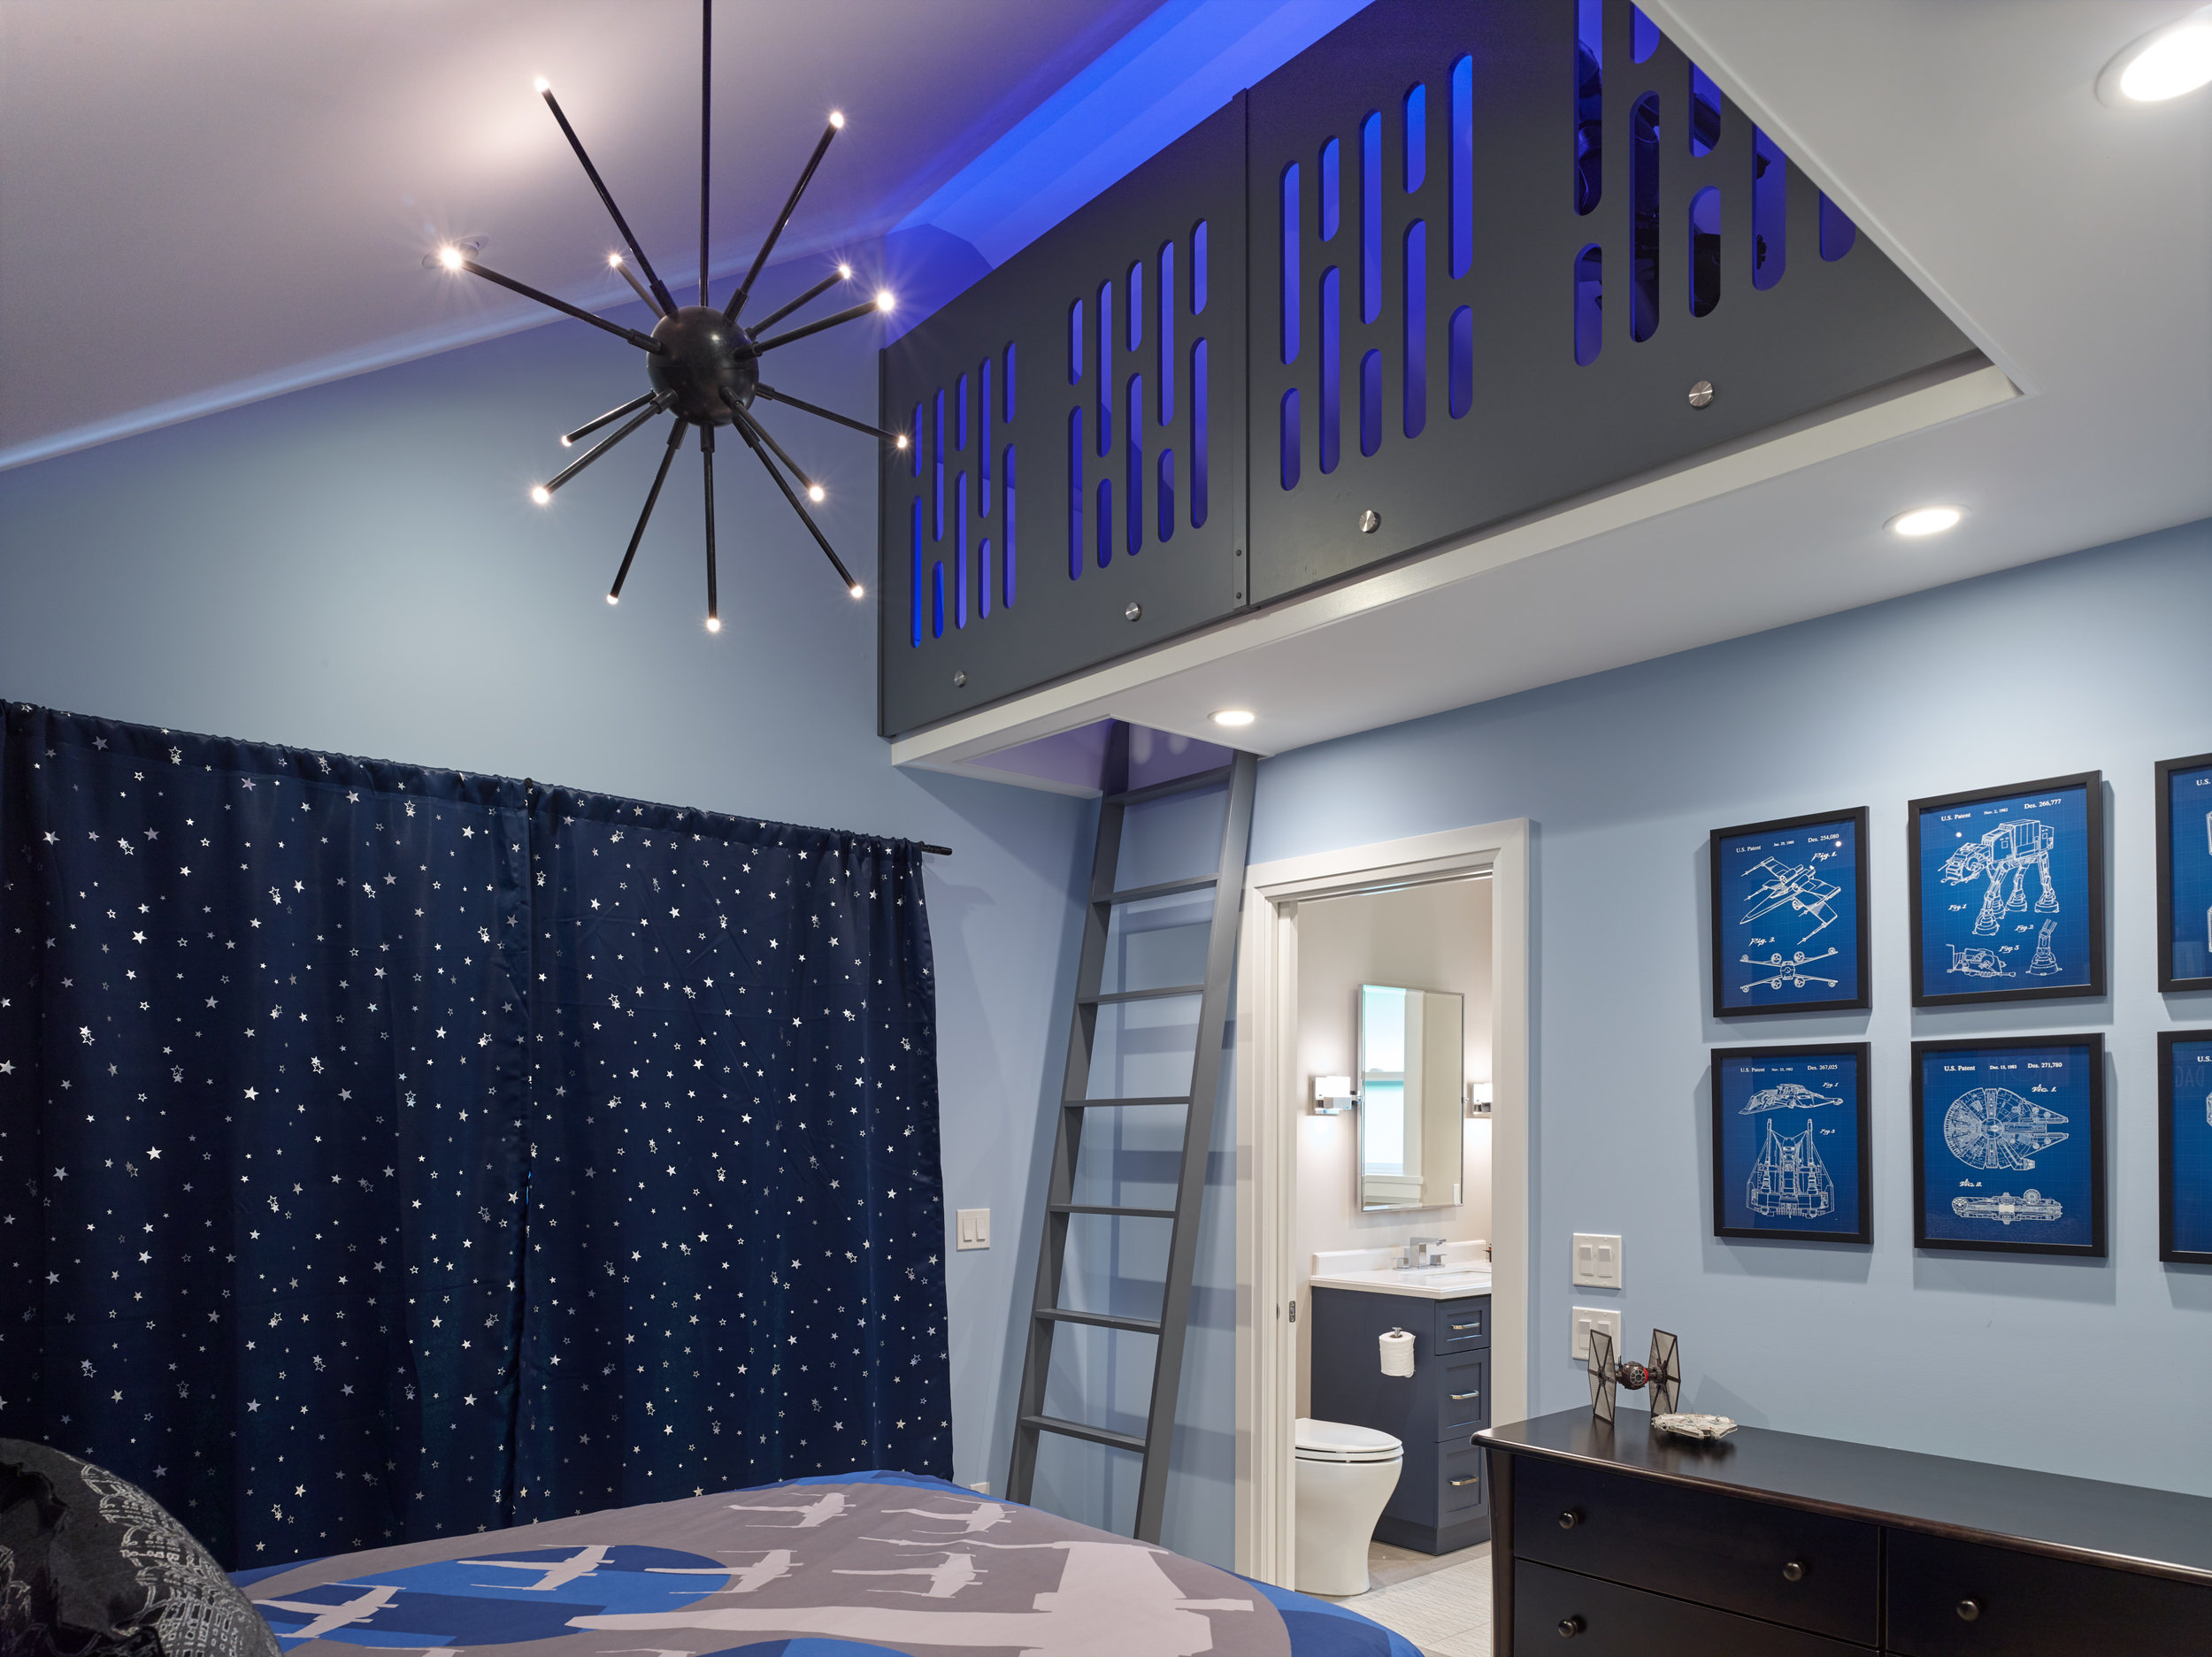
We’re big fans of great renovation projects—as much as we love that new-home smell, there’s something special about photographing a project where you just see all the love and care that has been put into customizing a place specifically for its occupants…as well as packing in plenty of energy-efficient healthy upgrades. This was certainly on full display with this extensive Langley renovation. In addition to having an absolutely gorgeous kitchen/great-room with all the fixings—and a stunning view over the Fraser River and up to the North Shore Mountains, this renovation was full of features made just for the family who owns it. The owners’ Manx cats even got their own features, with built-in cat doors in the ensuite to hide the litter box (and let’s not forget: mounting the toilet paper holders at a 45 degree angle…you fellow cat owners know the utility of that!). To top it off? The two kids’ bedrooms, each featuring ladder-accessible lofts, including a boy’s room in an absolutely stunning Star Wars theme complete with a light-up Darth Vader to greet you. The judges loved this project as much as we did, handing it the Best Kitchen Renovation Over $125K and Best Certified Whole House Renovation. Cheers to the My House Design/Build Team!


Get HPO CPD, IDIBC CEU, and AIBC LUs ASAP. OMG, WTF?

Now that was a mouthful of abbreviations, wasn’t it? And if none of it made sense, you can mosy on now and get back to your Boxing Day festivities, shopping, or whatever else you’re doing.

As for the rest of you: you read that right. We’re now offering continuing education courses for those of you who need to get credits—and those of you who are just plain curious.

For Builders:

CPD Course: Ovation Awards Tips and Strategies

It’s Ovation Awards season, and if you want to participate and haven’t gotten around to getting your entries together...well, here’s a gentle nudge to get with the program!

A year ago, our very own writer and photographer, Susan Boyce and Martin Knowles, teamed up with Lynn Harrison from Harrison Marketing and put together a live course for the Greater Vancouver Home Builders’ Association. The GVHBA is presently running a Boxing Week sale on courses on eLearn, giving you 20% off our course and all others. If you’re wanting a good opportunity to bundle up on a quiet winter day with a cozy blanket, a cup of something good, and leftover cookies, we encourage you to go check out:

https://elearn.gvhba.org/courses/ovation-awards-workshop-2018 

Use code BoxingWeek at checkout to get your discount (it’s good until December 31). 

 For Interior Designers and Architects:

Lunch and Learn: Specifying Architectural & Interiors Photography

We’re pleased to offer an IDCEC-accredited and AIBC-accredited 1 hour lunch and learn on Specifying Architectural and Interiors Photography. Have you ever done a photo shoot, had it blow past your wildest dreams for quality, and want to know how to replicate it? Or, gotten photos and wished they were closer to your vision for the project? Or...had a lot of good projects but you’re saying to yourself, “I wish I’d gotten this photographed?”

This CEU is a soup-to-nuts look at specifying architectural and interiors photography: how to choose photography, get it scheduled, get everything prepared onsite, work more effectively with your photographer to get the results you’re after, and share the load with your trades so everyone gets the images they need.

We can schedule this as a free lunch and learn for you and your team if you’re in the Vancouver area. If you’re working on your own, we’ll be presenting this as a lunch event later in the year. Drop us an email or call us and we’ll schedule it up for you! 

Field Review: Inovativ DigiPlate Lite for Location Photography

Field Review: Inovativ DigiPlate Lite for Location Photography

We shoot almost all our work tethered (i.e. directly to a laptop, on location). It’s not just a great way of making sure that we have everything right on location and that everything worked, but it’s also become an indispensable part of our workflow and creative process. When a draft of the image we’re producing comes up on a big, bright laptop screen, it’s a good way to get other people on site involved.

We love this kind of on-site collaboration—there have been many, many images that have been made so much better by us lining up an image, and an architect or interior designer noting “hey, I have an idea for making this even better”, us putting it in place together, and then making a few more creative improvements to really make the image sing. At the end of the shooting day, everyone knows they got the images they need, and we all go away happy. It’s a win for everyone.

But there’s one little problem: we like to move pretty quickly on site, and because we often work in small spaces (it’s Vancouver, after all…), lugging a laptop around on site can be a real pain because there’s nowhere good to put it. The standard solution to this has of course been TetherTools’ plates that are designed to mate your laptop to a lightstand, but this doesn’t make the problem go away: in fact, it makes it worse because when you have to move that lightstand around, that’s more opportunity for your expensive laptop to come crashing down, ripping the wiring out of your camera and causing everything to come to a screeching halt…a risk we really, really don’t like. (Thankfully, it’s never happened, but it’s a fear we live with).

Surely there has to be a better way: why can’t someone come up with a way to securely hold a laptop, and ideally do it in a way that we can just attach it to a tripod and get on with life? You’ve been able to do this with an iPad or Surface for ages, but we wanted the speed of wired tethering (scratch the iPad), and didn’t really want to deal with administering a finicky Windows machine that’s going to decide to install updates in the middle of your shoot. (scratch the Surface).

While we’ve for years suffered with dragging a MacBook Air along in a Thule semi-hard case to protect it from the elements (and since I’m usually in socks on location, hitting shortcut keys with my toes), when Apple came out with the 2018 MacBook Pro’s, we decided it was time to upgrade to a 13” MacBook Pro, which is both physically smaller than the old Air was (it positively swam in the old Thule case), and approximately the same weight. Chalk one up for Apple’s thin-and-light obsession.

The only thing left was to find a way to rig this onto a tripod securely, so that when you move the tripod, the laptop comes with (and you don’t have to get your assistant to move the extra stand around). In an ideal world, the laptop rig should be relatively light, easy to grab and pull off the tripod where necessary, and be riggable with inexpensive grip—ideally, stuff that’s already in the gear crib so we’re not out a bunch of cash if it doesn’t work.

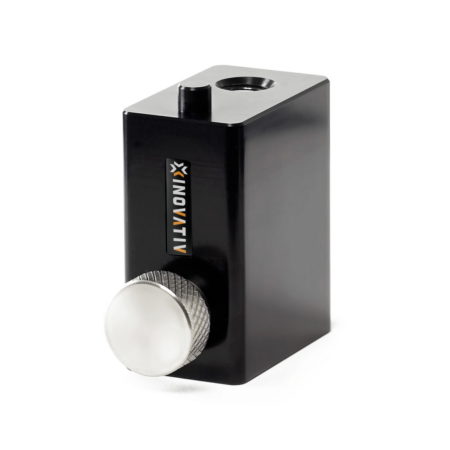
The DigiPlate Lite (photo: Inovativ)

The DigiPlate Lite (photo: Inovativ)


Enter the Inovativ DigiPlate Lite, which seemed to tick all the boxes. That, plus a Magic Arm and a Mafer clamp (both of which we had in the gear crib), and we should have a tethering system that works, right? Asking Inovativ about this via email yielded dead silence, and the DigiPlate Lite is new enough that our friends at Capture Integration, while they list it as something they’d soon carry, didn’t have any information on it yet…so the only option was to go buy it and try it out. The idea is solid: take a film-style “cheese plate” design that’s customizable, and put solid clamps on either side so that your laptop is firmly supported to the plate, and then mount the cheese plate itself onto your choice of mounting arrangement. Inovativ gives you two “preferred” mounting arrangements, the DigiBracket (which hangs off your tripod), and the DigiBase, which gives you industry-standard 3/8 (or 1/4x20 with the usual reducing bushing) and baby-pin mounts. While in theory the DigiBracket is made for our usual use of direct tripod mounting, it mounts on the tripod by friction, which means you have to pull your laptop off it when moving your tripod around…and we move the tripod around a lot on location. The DigiBase got the nod, begrudgingly, because we figured that what we’d really want to do is just screw it right into the top of the Magic Arm and get on with life. We bought the DigiPlate Lite kit from B&H in late August, since they were the only ones who seemed to have it in stock.


DigiBase (photo: Inovativ)

DigiBase (photo: Inovativ)

DigiBracket (photo: Inovativ)

DigiBracket (photo: Inovativ)

Assembly

The DigiPlate arrives as a “kit of parts” vaguely reminiscent of a kid’s Meccano Erector set. Unfortunately, the kit we ordered from B&H was defective: we got no DigiClamps, and two DigiBases instead. So we got the RMA and, with the Jewish holidays approaching and B&H showing no other stock available, we reordered directly from Inovativ instead, shipping it to our US package drop. Thankfully the second kit showed up complete (as well as giving us an opportunity to order and try out the DigiHanger for extra cable support; B&H didn’t stock this either). You get a box with a lot of parts bags (which include various hex screws, thumbscrews, hex keys, washers, stick-on rubber shims, etc) and a few little sheets of documentation to get you on your way. The documentation for individual parts is just barely adequate, and a bit of extra guidance—possibly on video—would be really useful for getting everything put together quickly and giving you an idea for what you can customize. If you’re mechanically inclined, a lot of things are fairly obvious despite minimal documentation and assembly is a fun challenge, but if you’re the sort of person who has trouble assembling Ikea furniture, you’re going to want to give yourself some time to build everything. It took us an hour to get everything all set initially, with a few little tweaks after our first test run on location.

The plate itself is designed to easily handle 13” and 15” laptops, and the clamps include a set of shims to deal with thicker laptops, and a set of rubber pads to hold everything in place. Inovativ intends for you to either keep the shims stacked up under a longer thumbscrew (which we’d do if we were teching and didn’t know what laptop would live on the stand at any given time), or use the smaller supplied thumbscrew and leave the extra shims in your gear crib (which is what we do). For a MacBook Pro 13”, the clamps are actually slightly too large to begin with, so we installed all the rubber pads, which locked the laptop down nicely. You have to install the supplied rubber padding on both the inside side, outside, and inside (two pieces go on the inside top, because the MacBook Pro 13” is thin). With all this installed, we’re pretty confident walking around holding the DigiPlate and knowing that the laptop is unlikely to slide out of its mount (and if it does, it won’t slide far anyway). One little quibble: that the clamps stick up a little high, so if something forcibly closed the laptop (or it dropped) and landed on the pads, we’d be very worried about a bent/broken screen. Inovativ stocks a set of ‘MacBook Air’ clamps, which with a shim or two would possibly be a better option for the new MacBook Pro’s. There’s no documentation on Inovativ’s site in this regard, so we don’t know for sure. (We’d be happy to test them if Inovativ shipped us a set, of course).

With a 13” laptop, the ‘ears’ of the DigiPlate actually stand proud by a few cm’s on either side, which gives the impression that the plate is oversized for the job, which it is—making it more likely to bang the corner of the plate into something on location accidentally. Everything is very solidly built from hard-anodized aluminum (in fact, it’s a little heavier than we’d have expected it to be) and inspires confidence that it’s going to survive many, many years of getting banged around, dropped, and otherwise will survive the abuse that we routinely dish out to grip equipment on location…and probably look fairly new when it’s finished.

In an ideal world, Inovativ would supply a set of ears just for 12”/13” laptops that are a bit more…form-fitting. However, the extra space gives you a good place to hang a DigiHanger, an accessory we’re glad we got. Since all of our tethering cables have Velcro straps, we’ve taken to hanging the Velcro straps off the DigiHanger, providing some strain relief, a very neat install, and drastically reduced likelihood of ripping a cable apart if something bad happens. (Inovativ shows a carabiner hanging off the DigiHanger, which we’d recommend if you aren’t already using Velcro ties on your cables). Sometimes we’ve just pushed the end of a USB tethering cable through (it fits, just), connected to a USB-A/USB-C dongle—which means that if the cable rips out, the dongle should take the force leaving the MacBook Pro’s USB-C port intact.

Underneath it all is the DigiBase, a solid block of aluminum with a twist-preventing stud. This gives you a very deep baby-pin mount as well as 5/16 and 1/4x20 screw holes. It’s intended to be installed atop a light stand. There’s a major annoyance: the security screw seems to be placed too low for this to work well. On most of our stands (even the ones with built-in 1/4x20 screw tops), and on the Magic Arm, you have to lift the whole assembly up in order for the security screw to lock onto the thinner body of a baby pin spigot, which means it’s less secure and very prone to working itself loose. We’re constantly checking and retightening this screw as things move around on location. If we were using the plate atop a lightstand that doesn’t move much, this wouldn’t bother us nearly as much, but we’d very strongly recommend installing a spacer of some sort (a round rubber adhesive ‘foot’ or two carefully inserted into the bottom of the baby pin receiver would probably do it) if you run into this problem. We’d probably install one ourselves if we planned to keep using the DigiBase, but more on that later.

On Location

With everything assembled, did it work as planned? In a word: absolutely! Our current tripod is an older Manfrotto 055XPROB, which will happily hold a Cambo Wide RS (or DS) atop an Arca-Swiss C1 Cube. We’ve equipped it with a Matin Tripod Butler, which we’ve found is a near-perfect (and foldable and almost weightless) tray for holding things like LCC plates, filters, and flash triggers. That lives on the tripod at almost all times. Adding a Mafer Clamp to that whole rig is a bit Macgyver-ish, but it gets the job done…especially since we already had a Mafer Clamp and a 10” Magic Arm hanging around. Here’s what it looks like in use:

Inovativ DigiPlate rig in use

It’s a nearly perfect one-tripod tethered capture setup. The 10” Magic Arm is a bit bigger than we’d like, but it provides a lot of support and means we can move the laptop to either side (or behind) the tripod easily and securely, making it easier for us as well as our clients to see what’s on the laptop. Clients have also noted how cool and convenient everything is, which is always a plus as well.

We’ve been using this rig for both interior and exterior work on numerous locations for the last month, and it’s performed beautifully. Finally, we have a setup that puts the laptop at a good working height, holds everything securely, and really speeds up tethered capture on location because the entire laptop is within easy reach. Most importantly, the whole thing can be easily moved around by one person. I often find myself grabbing the tripod by one leg and the Magic Arm. This grip lets one person get around a floor, up and down stairs, and through some fairly marginal outdoor terrain (‘tis the season for wet dirt in landscape projects!) without any risk of pulled cables, and providing a lot of safety for all the gear.

We love the solidity of the whole rig, and the fact that the plate is also very easy to carry and store (it nicely slips into a flat area in our grip case). It’s also incredibly cost-effective, even considering the extra Customs fees because none of the local Canadian distributors seem to carry it yet. The “cheese plate” design is awesome, because you can customize it to fit your workflow easily—Inovativ offers a variety of clamps for dealing with cables, external hard drives, etc., most of which can be installed anywhere on the flat plate that happens to fit the way you work. And did we mention it’s really secure…outside of the issues with the DigiBase? (Inovativ actually shows laptops being held upside down from light stands on their Instagram feed—go check it out!)

Places For Improvement

All that said, there are a few things we’d love to change.

1. Inovativ needs better pre-sale support! When you sell a system that’s this customizable, it takes a bit of research (and some “local knowledge”) to get the system you want (and for non-US folks, cross-border shipping and returns are a real pain so it’s important to get things right the first time). Most suppliers in both the photo and design industries (including us!) are happy to answer questions and make sure you get what you need. Inovativ didn’t answer email or phone calls, which meant we were on our own to figure out what was likely to work. Go hire some good people for this, Inovativ! You have a great product, and people are going to need a bit of hand-holding and documentation in order to get the best bits that will fit their needs.

2. We’d like slightly less tall clamps. The current clamp arrangement works, but we’d like about 1.5mm less risk of bending/bashing a screen in if the rig falls screen-side-down. This might mean either Inovativ providing slightly shorter clamps as their regular Universal clamps (which, given the shim arrangement they use, would make things much more friendly for new MacBook Pro users without making things much more difficult for others), or providing a custom version of the MacBook Air clamps. (We’ll happily beta-test).

3. It would be really nice to have shorter “ears” available for us users of 12”/13” laptops. The plate ears could easily be a few cm’s shorter on either side without losing functionality, and it would make things more flexible, lighter, and easier to deal with for those of us using smaller laptops.

4. We really dislike the DigiBase. As we mentioned, it’s too deep on a stand to be securely attached as shipped, and on a Magic Arm, it’s even harder to attach securely and be confident about its attachment. It’s also heavy and awkward. While we could easily remove the DigiBase and just screw the DigiPlate into the top of the Magic Arm, we’d lose the ability to leave the Magic Arm on while removing the DigiPlate from it, which we find ourselves doing a lot.

What would be ideal: screwing an Arca-Swiss plate to the bottom of the DigiPlate, and screwing an Arca receiver into the top of the Magic Arm. If Inovativ offers an Arca plate (perhaps with the same anti-twist pin that the DigiBase has), we’d love to try it; otherwise, we’ll probably buy a generic Arca plate and receiver and re-rig this part of the setup; thankfully, with the ‘cheese plate’ design this is trivial to do and will give us an even more usable rig than it’s providing us now.

TL;DR

This setup has very rapidly become indispensable, and apart from some quibbles, we’re keeping it and recommending it to others!

GVHBA members: Make A Better Awards Entry. Earn CPD Points!

GVHBA members: Make A Better Awards Entry. Earn CPD Points!

It’s a week off the Georgie Awards deadline, and we’re completely slammed putting together awards entries for many of our clients’ amazing projects, and it seems too early to be even thinking about the GVHBA Ovation Awards. (What’s that you say? There’s a world after 8:00PM on October 1? Yeah, we don’t believe it either).

Yet here we are, and as some of you know, every year or so Lynn Harrison of Harrison Marketing Resources, our very own Susan M. Boyce, and I get together and present a couple of hours of tips, tricks, traps, and goodies for making stronger entries in our local building awards programs. The course we delivered last year is up on GVHBA’s e-learn, which means you can take it it and get your CPD points on a gray, rainy weekend without even having to move your pet out of the way and get out of your pyjamas. If you register before the end of the day this Monday, September 24, and use code FALL18, you’ll get 20% off this and other courses on e-learn. So, if you need those coveted CPD points and you want to improve your business and your building, go check out the other courses on e-learn as well.

https://elearn.gvhba.org/courses/ovation-awards-workshop-2018

We’ll also do a live, updated version of this course later on once the Ovation Awards call for entries is up. If you want to go to the live course instead, it’s on October 31 over at Schluter in Burnaby. That’s Halloween, so we put together a Halloween-themed marketing blurb…which the GVHBA sadly didn’t use:

Think it’s scary putting together an Ovation Awards entry for your not-so-haunted house? Treat yourself to this course—it’s sure to fill your skull with knowledge. We’ll give you a cradle-to-grave look at the process so you can ghost smoothly through, demystify ‘witch’ categories you should enter, dress your project description up, and give you some good tricks so you’re more likely to end up with a whole bag full of honours at the end of awards night. Give it a boo!

Go register here.

Free Webinar! Georgie Awards: Steps to Success

As of this writing, it's a month and a half until the Georgie Awards deadline. Which means...it's a great time to get started on your entry so you can beat the last-minute rush. Particularly if it's your first time entering the Georgies, the whole process can seem more than a little daunting. There's figuring out which of 40-odd categories you want to enter, getting the photography together, writing your entries, and then wrapping everything all together and getting it to the CHBA.

We'd like to make that process a little less overwhelming for you...and give you some great time-saving tips on the way. Join us for a free webinar, Georgie Awards: Steps to Success, where writer Susan M. Boyce and I will walk you through the process. The webinar is on August 23 at 11am...so grab your lunch a little early and join us online. Or, if you can't make it, sign up for the webinar anyway and we'll send you a replay afterwards.


P.S. We also offer full service awards entry packages that include both writing, photography, and an extra hand in getting everything all packaged up and uploaded properly. Check it out!

5 Tips for Getting Published, from GRAY

Yesterday at the AIBC Annual Conference, Spaces Between, GRAY Magazine's Chief Creative Officer Stacy Kendall and I closed out the conference with a presentation The Spaces Between Projects: Getting Published, Winning Awards, and Finding Your Next Project. We had a solid crowd at the talk--which is always a good thing, particularly when you're those last 1.5 Core Learning Units Standing Between You And Happy Hour.

After the conference, she put out a list of her top 5 takeaways for increasing your chances of getting published on the GRAY e-mail list. They've graciously allowed us to share it with you, so check it out!

Our top five tips on how to get your project published in GRAY

One of the points we made was that the work you do in commissioning architectural photography  and thinking through your project's story will help you across all your media, whether you're entering awards, putting together case studies, pitching your project for print, getting things on Instagram, or writing blog posts. And to help you out with that, here's our 6-step guide to commissioning better photography:

6 Steps to Distinctive Architectural Photos

It Takes A Village: Introducing the Contributor Program

It Takes A Village: Introducing the Contributor Program

It takes a village...of trades, suppliers, consultants, and other expertise to build a great project. And the work of all of those people contributes to making a great project exceptional. Everyone takes pride in a job well done, so why not share your costs of photography with everyone on your project as well?

Right...because that's a lot of work you probably don't want to deal with right at the end of the project. We get it.

That's why we're introducing the Contributor Program. The Contributor Program makes it easier to share the costs of your photography, make sure your trades and suppliers get photos of their work as well, and share the costs of photography fairly across all parties--because while an architect might need five images, the builder might need ten for a contest, the flooring supplier needs two images, and the interior designer might want twenty. Our pricing has always made that possible, but we're taking it one step further.

To participate, all you need to do is share your supplier contact list with us when your project is complete and we're setting up photography. We'll make contact with as many as we can (and you're comfortable with), and do all the legwork to get people on board. Do you have a project that we've recently photographed where you have suppliers interested after the shoot? We can work with that as well, and you'll get a discount on the next project we photograph.

Check out our infographic on how it all works, and on your next project, involve your suppliers early on!